
Printing Photos from a Computer (Mac OS)
This section describes how to print photos with a software application on your computer.
-
Open the paper support (A) of the rear tray, then extend the paper support extension (B).
-
Open the paper output tray (C) gently.
-
Open the output tray extension (D), then pull out the paper output support (E).

-
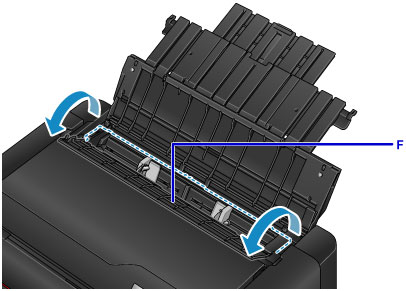
Open the feed slot cover (F).
-
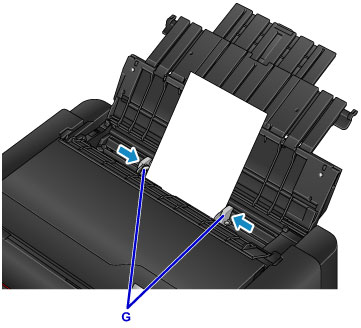
Load paper vertically WITH THE PRINT SIDE FACING YOU.
-
Align the paper guides (G) with the paper width.
-
Close the feed slot cover gently.
The paper information registration screen for the rear tray is displayed on the LCD.

-
Select the size and type of paper loaded in the rear tray at Page size and Type, select Register, then press the OK button.

If a message is displayed on the screen, follow the directions in the message to complete registration.
-
Select Print from the software application's menu.
In general, select Print... from the File menu to open the Print dialog.
 Note
Note- For details on the operations of software application you use, refer to the user's manual of your software application.
-
Select your model from the Printer list.
Click Show Details to switch the Setup window to the detailed display.

-
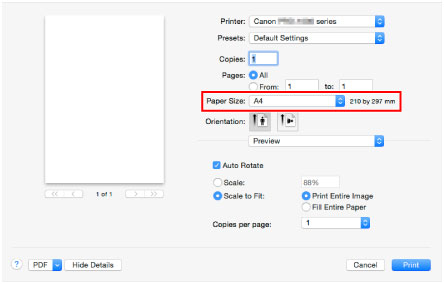
Select the paper size.
For Paper Size, select the paper size to be used.
-
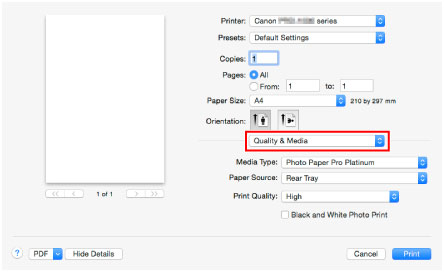
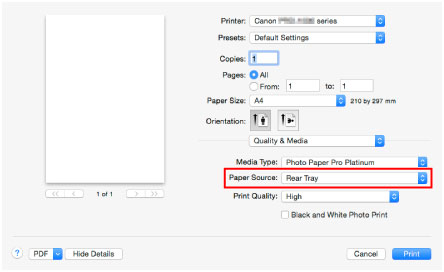
Select Quality & Media from the pop-up menu.
-
Select the media type.
For Media Type, select the same paper type loaded in the printer.
-
Select the paper source.
Select the rear tray in which you loaded the paper at Paper Source.
-
After completing the setup, click Print, then execute print.
![]() Note
Note
-
The Print dialog of the printer driver enables you to specify various settings for printing.
